
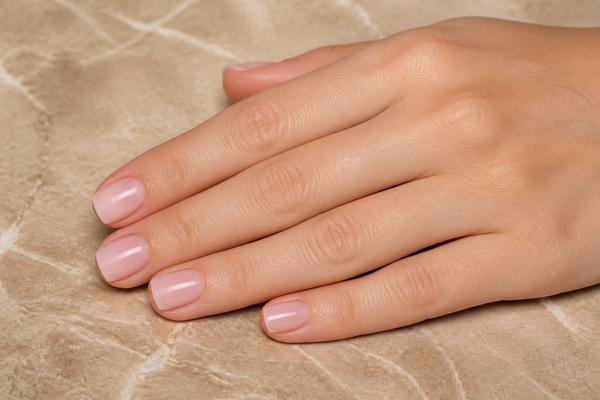
Short square nails look precise because every line is visible: the sides are straight, the front edge is level and the two corners finish at matching heights. The same clarity also exposes weak construction and careless filing. Removing too much from the sidewalls creates fragile corners, while leaving excess width can make the nail look heavy. A well-made short square balances a crisp outline with enough support for the client’s normal routine.

What defines a balanced short square
A short square depends on parallel side lines and a free edge that crosses the finger axis cleanly. Its corners are not decorative points added at the end. They are the continuation of the sidewalls, so their strength begins in the stress area. If the sides are scooped inward, the front may still look square for a moment, but the unsupported corners are more likely to split or chip.
The square should also match the natural growth direction. Some plates fan outward, grow downward or have one sidewall lower than the other. Correct visual imbalance gradually and preserve safe contact with the natural support points. A perfect geometric box is not the goal if achieving it means over-filing a thin plate.
Four structural points to inspect
- Side lines: should read straight from stress area to corner. A slight natural difference can be corrected visually without carving a deep waist.
- Free edge: should appear level from the client view and have a consistent thickness from left to right.
- Corners: should end at comparable heights and retain enough material to resist ordinary knocks.
- Lower view: reveals whether one side has been filed higher, whether the front slopes and whether product has collected underneath.

Decide how strict the corners should be
Start by asking how the hands are used. A strict square with sharp corners may suit someone who likes a graphic finish and wears a practical short length, while a very small softening can be preferable for gloves, textiles or frequent keyboard work. Softening only removes the sharp edge; it should not turn the shape into a rounded squoval unless that is the agreed result.
Assess the natural sidewalls before shortening. If the plate widens toward the front, removing all visible width can weaken the sides. If it narrows, forcing perfectly parallel lines may require structure rather than more filing. Choose the most square result that the available support can carry.
- Set the final short length before refining either corner.
- Keep both side lines visually straight without cutting into stress points.
- Choose strict or lightly softened corners according to daily use.
- Maintain an even front thickness across the entire free edge.
- Compare corresponding fingers from the client viewpoint.
How to shape a short square step by step
Hold the file perpendicular to the finger axis and shorten the front with controlled movements. Check from the client view before it becomes too short. Then place the file alongside each sidewall and refine only protruding material, working in small alternations rather than finishing one side first.
Create the corners where the side lines meet the front edge. For a strict square, remove only roughness. For a wearable square, pass the file once or twice over the sharpest point without rounding deep into the side. Dust thoroughly and check the front, side and underside before applying colour.
- Establish one level free edge at the agreed short length.
- Refine each side line while preserving the stress points.
- Compare corner height and correct the side that breaks the front line.
- Remove sharp burrs without rounding away the square structure.
- Check the underside, axis and matching fingers before finishing.

Why square corners crack or lose shape
- Filing inward from the stress points: creates a narrow waist and unsupported corners.
- Tilting the file under the front: makes the edge bevelled and corners unequal.
- Rounding only one corner: shifts the visual centre and makes the nail look twisted.
- Adding product only to the tip: increases bulk without correcting the supporting architecture.
- Keeping sharp corners for every lifestyle: ignores repeated snagging and impact patterns.
Structure, length and finish choices
On natural nails, the square should respect the existing side support. Use an abrasive suitable for natural plate and avoid forceful sawing. If a corner has already split, do not file deeper simply to make the opposite side match. Shorten or choose a softer shape that preserves sound material.
On strengthened nails, place product where the short square needs support rather than creating a uniformly thick surface. The apex remains subtle at this length, the free edge stays fine but continuous, and both lower side lines should be clean. Product touching skin must be removed before curing.
Opaque dark and white shades emphasise a sloping front line. Milky or nude colour can look softer but does not correct structural differences. Check the bare outline first, then inspect again after colour because a thin gap at one corner can change the apparent shape.
Final square-shape inspection
- Both side lines appear straight and supported.
- The free edge is level to the finger axis.
- Corners finish at matching heights.
- No side has a deep inward notch.
- The underside is clean and the front thickness is even.
- Corner sharpness suits the client’s routine.
Products for a supported short square
Explore nail tools and accessories. For planning extensions see Nail Extension Forms 100 pcs, and for controlled builder gel structure consider Jelly Flow GJ07. Choose the file grit and building method for the exact material being shaped.
A durable short square comes from preserved side support, a level free edge and deliberate corner finishing. Set the length first, work in small alternating corrections and check from the client view as well as underneath. The result remains crisp without sacrificing the points that make the shape wearable.