
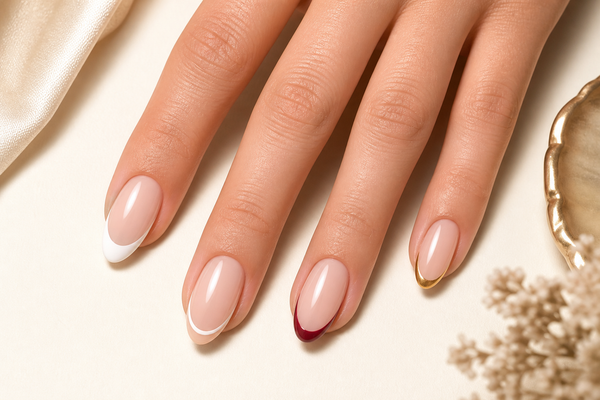
A balanced French manicure begins with nail shape and proportion. The smile line should support the nail, whether it is classic, micro or coloured.

Start with the cause, not a new product
Prepare the base colour in a thin, even layer and correct the shape before painting white or colour. A classic French line follows the visual curve of the free edge. Micro French uses a very fine line and works best on a smooth, accurately shaped tip. A coloured version can be softer or graphic, but the thickness should remain consistent across the set.
A practical check, step by step
- Shape every nail and compare lengths before adding colour.
- Apply a level nude or milky base and cure it fully.
- Mark the centre and both side points of the smile line.
- Connect the points with a fine brush and refine the curve.
- Cure before sealing with a compatible top coat.
What commonly goes wrong
Correcting a smile line repeatedly with a loaded brush can leave a ridge that remains visible under top coat. Lines that start at different sidewall heights also make otherwise equal nails look uneven. Remove excess before curing instead of trying to level it with a thick top.
Good practice before the next manicure
Work on a clean, healthy nail plate and follow the instructions supplied with the exact product and lamp. Application times, removal method and compatibility can differ between systems, so a familiar routine should never replace the manufacturer’s directions.
Keep every layer controlled and away from the skin. If gel touches the cuticle or sidewall, remove it before curing. Stop the service when the nail or surrounding skin shows pain, unusual redness, swelling or signs of infection and recommend assessment by a qualified professional.
Change one variable at a time when diagnosing a problem. Record the preparation, products, layer thickness, lamp and curing time. This makes the real cause easier to identify and prevents unnecessary product changes that do not solve a technique or equipment issue.
Choose products by function
Compare the relevant category and choose the product whose function matches the technique described here. The correct base, colour, top or preparation liquid is more useful than adding extra products without a clear purpose. Choose products by function.
Photograph the hand straight on and from above. These views reveal proportion differences that are hard to see while working one finger at a time and help refine the next set.