
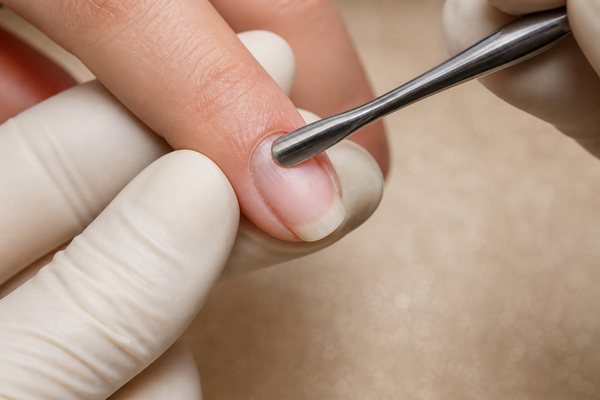
A polished contour is not created by removing as much tissue as possible. It comes from seeing which material is non-living cuticle attached to the nail plate, which part is the living proximal nail fold and how much access the service actually needs. Overworking the area can create soreness, broken skin and an uneven surface without improving adhesion. Professional preparation is measured, visible and stopped as soon as the coating can be applied cleanly.

Cuticle tissue and living skin are not the same
The cuticle is the thin, non-living tissue that can adhere to the nail plate as it grows. The proximal nail fold is living skin that forms a protective boundary. These terms are often mixed in everyday language, but the practical distinction matters: attached cuticle can interfere with the product margin, while healthy living skin should not be cut or abraded simply to create a deeper pocket.
A clean result needs visibility. Good lighting, a stable hand position and dry, dust-free access are more valuable than extra pressure. If the tissue cannot be identified clearly, stop and reassess rather than pushing a sharp tool into a hidden area.
Do not continue over cuts, bleeding, pain, inflammation, swelling, unusual colour or suspected infection. A cosmetic manicure does not diagnose or treat skin and nail conditions. When the area is not suitable, postpone the coating and recommend appropriate professional assessment.
Choose the least aggressive suitable method
- Gentle manual preparation: suitable when little tissue is attached and visibility is good.
- Cuticle remover: softens excess tissue for controlled pushing and removal according to the label.
- E-file preparation: requires training, correct bit, angle and speed; it is not a faster substitute for tissue recognition.
- Combined method: use only the steps genuinely needed rather than repeating every technique on every client.

A controlled preparation sequence
Begin by sanitising hands and tools according to the salon protocol. Assess the nail and skin before shaping or lifting tissue. Use a clean pusher with light, controlled movements to expose what is attached to the plate. The tool should glide, not scrape grooves into the natural nail.
When using Cuticle Remover, dose it precisely with the pipette, wait only as directed and gently push back the softened tissue. Remove all residue and wash or cleanse exactly as the label requires before continuing. Product left on the plate can contaminate the preparation and reduce predictability.
- Work under clear light and stabilise the finger.
- Lift tissue gradually without forcing the proximal fold.
- Keep tools almost parallel to the nail rather than digging downward.
- Remove only clearly identified non-living tissue.
- Stop immediately if the skin becomes painful or compromised.
How to check the contour before coating
After preparation, view the contour from above and from each side. The plate near the fold should be clean and matte after the later surface-preparation step, without shiny tissue islands, dust or fresh abrasion. The skin should remain intact and calm.
Before base application, move the finger through the working angle and check whether any fold hides the margin. Better positioning may provide the needed access without further removal. A precise brush and a small product amount produce a neater line than an unnecessarily deep cuticle treatment.
- Inspect proximal and lateral areas under direct light.
- Check for attached tissue without scraping repeatedly.
- Remove dust and every remover residue.
- Confirm skin is intact before preparation liquids.
- Apply the coating with a clean, visible safety margin.

Common cuticle preparation mistakes
- Cutting living skin for a deeper line: creates injury risk without guaranteeing a cleaner application.
- Holding a pusher too steeply: can scratch or thin the natural plate.
- Using an e-file without visibility: speed cannot compensate for poor tissue identification.
- Leaving remover residue: introduces contamination before adhesion steps.
- Applying oil before coating: care products belong after the manicure, not on the prepared bonding surface.
Remover before coating, oil after the service
Cuticle Remover is a preparation aid, not a product to leave under gel. Apply only to the intended area, respect the label time and remove the softened material without force. Clean away every residue before dehydrator, primer or base.
Cuticle oil has the opposite place in the sequence. Euphoria Cuticle Oil P006 conditions dry cuticles and surrounding skin after the manicure. Massage in a small amount once all colour and top coat steps are cured and finished.
Tools need a hygiene process appropriate to their material and local salon requirements. Disposable abrasives are not shared. Reusable metal tools must be cleaned and processed correctly between clients. A neat contour begins with safe equipment as much as with technique.
Cuticle preparation checklist
- Nail and skin are suitable for cosmetic service.
- Living skin is distinguished from attached cuticle.
- The least aggressive effective method is chosen.
- No pain, bleeding or excessive redness is present.
- Remover and dust are completely eliminated.
- Oil is reserved for the finished manicure.
Products for preparation and finishing care
Explore the nail preparation collection. For controlled softening see Cuticle Remover, and for finishing care after the completed service use Euphoria Cuticle Oil P006 10 ml. Follow the label and salon hygiene procedure at every stage.
Professional cuticle preparation is defined by control, not depth. Identify tissue, create only the access needed for a clean product margin and keep living skin intact. When remover is fully cleared before coating and oil is applied only after finishing, the result looks precise without sacrificing comfort or safety.